Introduction: Why CAD/CAM Integration Matters in Digital Dentistry
Modern dentistry is moving from traditional impressions and manual production toward a connected digital workflow.
Instead of taking a physical impression, sending it to a laboratory, waiting for a plaster model, and manually producing the final appliance, clinics and dental laboratories can now connect digital scanning, CAD design, and 3D printing into one workflow.
A typical digital dental workflow can be summarized as:
Scan → Design → Prepare → Print → Post-Process → Deliver
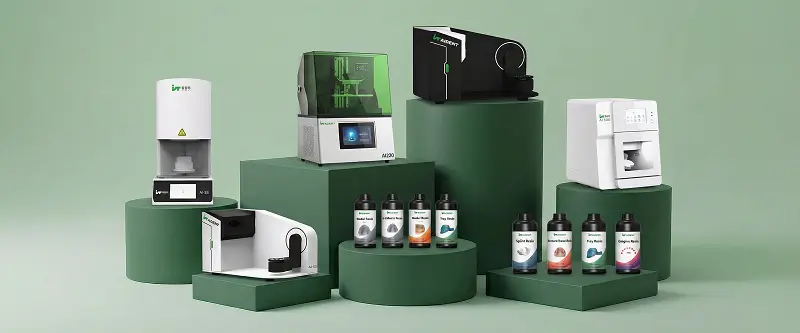
Aident3D is designed around this digital workflow, combining intraoral scanning, dental laboratory scanning, CAD/CAM compatibility, dental 3D printing, and dental 3D printing materials.
For clinics and dental laboratories considering CAD/CAM integration, the key question is not simply which scanner or printer to purchase.
The more important question is:
How well can the equipment work together as a complete digital workflow?
This guide explains how to integrate Aident equipment with CAD/CAM software and how to build an efficient digital dentistry workflow.
1. What Is a Dental CAD/CAM Workflow?
CAD/CAM stands for Computer-Aided Design and Computer-Aided Manufacturing.
In dentistry, CAD/CAM technology allows patient or model data to be digitally captured, designed, modified, and manufactured.
A basic workflow consists of three major stages:
1. Data Acquisition
The patient's oral anatomy is captured using an intraoral scanner.
For laboratory workflows, a dental lab scanner can digitize physical models, impressions, or other dental objects.
2. CAD Design
The digital scan data is imported into dental CAD software.
The technician or dentist can then design:
Crowns
Bridges
Implant restorations
Surgical guides
Denture components
Orthodontic models
Temporary restorations
Clear aligner models
Diagnostic models
3. CAM Manufacturing
After the design is completed, the digital file is transferred to a manufacturing device.
Depending on the application, the final product can be produced through milling, 3D printing, or another manufacturing process.
For resin-based dental applications, a dental 3D printer provides a direct path from digital design to physical production.
2. How Aident Fits Into the CAD/CAM Workflow
Aident's digital workflow can be understood as:
Aident Scanner → CAD Software → Aident Dental 3D Printer → Dental Resin → Finished Product
The scanner captures the digital information.
CAD software processes and designs the case.
The dental 3D printer manufactures the physical model or appliance.
The resin determines the material properties required for the specific application.
This creates a connected workflow instead of treating each device as an isolated piece of equipment.
Aident currently provides intraoral scanners, dental lab scanners, dental 3D printers, dental resins, and related digital dentistry solutions.
3. Step 1: Capture Digital Data with the Aident AI-30
The first step is acquiring accurate digital data.
The Aident AI-30 Intraoral Scanner is designed for digital impression workflows and can export digital scan data for downstream CAD/CAM processing.
Aident's published workflow documentation describes the AI-30 as supporting high-accuracy scanning and compatibility with major dental software platforms such as 3Shape and exocad.
The basic scanning workflow is:
Prepare the patient's mouth.
Start the intraoral scanning software.
Scan the teeth systematically.
Capture the full arch.
Record the opposing arch.
Capture the buccal bite relationship.
Check the scan for missing areas and artifacts.
Complete the digital impression.
Export the required digital file.
Recommended scanning check
Before moving to CAD design, always check:
Are all required teeth captured?
Are the preparation margins visible?
Is the occlusion complete?
Are there holes or missing areas?
Is there excessive soft-tissue data?
Is the scan free from obvious distortion?
Is the bite relationship correct?
A good CAD/CAM workflow starts with good digital data.
If the scan is incomplete or inaccurate, CAD software cannot completely correct the problem later.
4. Step 2: Export the Scan Data
Once scanning is completed, export the digital case into a format supported by your CAD/CAM workflow.
Common dental digital formats include:
STL
PLY
OBJ
STL is particularly common for CAD and 3D printing because it represents the surface geometry of the scanned object.
Aident's published integration guidance identifies STL as one of the most widely used formats for transferring intraoral scan data into CAD/CAM and 3D printing workflows.
Depending on your scanner software and CAD system, additional formats may be available.
Practical recommendation
Before purchasing equipment, confirm:
Scanner → File Format → CAD Software → CAM/Printer
The most important factor is not simply whether two devices have the same brand.
The key is whether the digital data can move smoothly between them.
5. Step 3: Import Aident Scan Data into CAD Software
After exporting the scan, open your preferred dental CAD software.
Aident's digital workflow is designed around an open workflow rather than requiring users to remain inside a proprietary ecosystem.
Aident documentation references compatibility with platforms including:
3Shape
exocad
Other CAD/CAM applications supporting standard dental file formats
The general workflow is:
Open CAD Software → Create New Case → Import Scan → Define Patient/Case Data → Start Design
Depending on the application, you may need to import:
Upper arch
Lower arch
Bite scan
Preparation scan
Implant scan
Gingiva data
Additional reference data
6. Step 4: Design the Dental Restoration or Model
After importing the scan, the CAD software becomes the main design environment.
For example, a crown workflow may include:
Define the preparation.
Mark the margin.
Select the restoration type.
Set insertion direction.
Adjust the restoration parameters.
Design the anatomy.
Check proximal contacts.
Check occlusion.
Inspect minimum thickness.
Complete the final design.
For orthodontic applications, the workflow can be different.
The technician may instead:
Import the digital model.
Segment the teeth.
Define the treatment plan.
Generate individual stages.
Create the corresponding dental models.
Export the models for 3D printing.
The same digital scanning infrastructure can therefore support multiple clinical and laboratory applications.
7. Step 5: Prepare the CAD File for 3D Printing
After the CAD design is completed, export the final model.
A typical workflow is:
CAD Design → Export STL → Import into Slicing Software → Orient Model → Add Supports → Slice → Send to Printer
Before printing, review the model carefully.
Check the following:
Model orientation
Choose an orientation that balances surface quality, support requirements, printing time, and material consumption.
Support placement
Avoid unnecessary supports on critical surfaces whenever possible.
Wall thickness
Make sure the designed structure meets the requirements of the selected application and material.
Print area
Check whether multiple models can be arranged efficiently on the build platform.
File integrity
Make sure the STL or other digital file is complete and free from obvious mesh errors.
8. Step 6: Print with an Aident Dental 3D Printer
Once the digital file is prepared, it can be transferred to an Aident dental 3D printer.
Aident provides dental 3D printing systems designed for applications including:
Dental models
Surgical guides
Clear aligner models
Denture-related applications
Temporary restorations
Diagnostic models
Other dental applications
Aident's current product and workflow materials position models such as the Ai-C60 and Ai220 within its digital dental production ecosystem.
The general manufacturing workflow is:
STL → Slicer → Printer → Wash → Cure → Finish
The correct printer and resin should be selected according to the intended application.
9. Step 7: Choose the Right Dental Resin
CAD/CAM integration does not end with the printer.
Material selection is equally important.
Different dental applications require different materials.
For example:
| Application | Typical Digital Workflow |
|---|---|
| Diagnostic Model | Scanner → CAD → Model Resin → 3D Printer |
| Clear Aligner Model | Scanner → CAD → Model Resin → 3D Printer |
| Surgical Guide | Scanner/CBCT → CAD → Surgical Guide Resin → 3D Printer |
| Denture Model | Scanner → CAD → Dental Model Resin → 3D Printer |
| Temporary Restoration | Scanner → CAD → Temporary Resin → 3D Printer |
| Try-in | Scanner → CAD → Try-in Resin → 3D Printer |
Aident provides dedicated dental resins intended to work with dental 3D printing workflows.
The correct combination should always be selected according to the intended clinical or laboratory application and the manufacturer's validated workflow.
10. Complete Aident CAD/CAM Workflow
The complete digital workflow can therefore be summarized as follows:
Clinic Workflow
Patient
↓
Aident AI-30 Intraoral Scanner
↓
Digital Scan Data
↓
3Shape / exocad / Compatible CAD Software
↓
Digital Design
↓
STL Export
↓
Aident Dental 3D Printer
↓
Dental Resin
↓
Post-Processing
↓
Finished Dental Model or Appliance
This workflow removes many physical steps from the traditional process.
Instead of:
Physical Impression → Shipping → Plaster Model → Manual Processing → Production
the digital workflow becomes:
Scan → Design → Print
Aident itself describes its digital solution using the Scan → Design → Print concept.
11. Aident + 3Shape Workflow
For dental laboratories already using 3Shape, the workflow can be structured as:
Aident AI-30 / Lab Scanner
→
3Shape
→
Dental CAD Design
→
Export STL
→
Aident 3D Printer
→
Post-Processing
The major advantage is that the scanner does not have to be replaced simply because the laboratory uses another CAD platform.
The open digital workflow allows the data to move between different parts of the production chain.
12. Aident + exocad Workflow
The same concept can be applied to exocad.
Workflow
Aident Scanner
→
Scan Data
→
exocad
→
CAD Design
→
STL
→
Aident Slicing / Printing Workflow
→
Dental 3D Printer
This can be particularly useful for laboratories that already have an established exocad workflow.
The goal is not to change the entire digital ecosystem.
Instead, Aident equipment can become part of the existing workflow.
13. How to Reduce CAD/CAM Workflow Errors
One of the biggest benefits of digital dentistry is repeatability.
However, a digital workflow can still produce errors if each stage is not checked.
A simple quality-control system should include four checkpoints.
Checkpoint 1: Scan
Confirm:
Complete anatomy
Clear margins
Correct occlusion
No obvious holes
No unnecessary artifacts
Checkpoint 2: CAD
Confirm:
Correct restoration type
Correct margins
Proper contacts
Proper occlusion
Adequate thickness
Checkpoint 3: Print Preparation
Confirm:
Correct orientation
Appropriate supports
Correct printer profile
Correct resin
Correct layer settings
Checkpoint 4: Post-Processing
Confirm:
Complete washing
Correct curing
No visible deformation
Proper surface quality
Dimensional accuracy appropriate for the application
The most effective digital workflow is not simply the fastest workflow.
It is the workflow that minimizes rework and remakes.
14. How CAD/CAM Integration Can Improve Dental Laboratory Efficiency
A well-integrated CAD/CAM workflow can provide several operational advantages.
Faster Data Transfer
Digital scan files can be transferred immediately instead of physically shipping impressions.
Easier Case Storage
Digital patient cases can be stored electronically and accessed when needed.
Easier Communication
Dentists and laboratories can share digital cases without repeatedly transporting physical models.
Faster Design Changes
CAD designs can be modified before manufacturing.
More Flexible Production
The same digital design can potentially be manufactured again when required, subject to the applicable clinical and technical requirements.
Better Production Planning
Dental laboratories can organize multiple digital cases and send them to production according to priority.
Aident's published digital workflow emphasizes the combination of scanning, CAD design, 3D printing, and post-processing as a connected production chain.
15. Common CAD/CAM Integration Problems
Even when every device works correctly, integration problems can occur.
Problem 1: The CAD Software Cannot Open the File
Possible reasons include:
Unsupported file format
Incorrect export settings
Damaged mesh
Software compatibility issues
Solution
Check the scanner's available export formats and confirm that the CAD software supports the selected format.
Problem 2: The CAD Design Looks Correct but the Printed Model Does Not
Possible causes include:
Incorrect print orientation
Incorrect scaling
Poor support placement
Incorrect printer parameters
Resin or post-processing problems
Always verify the digital model and print preparation before production.
Problem 3: The Occlusion Is Incorrect
This may originate from the bite scan rather than the printer.
Check:
Buccal scan
Upper/lower alignment
Bite registration
Missing scan areas
The printer cannot correct incorrect digital occlusion data.
Problem 4: The Workflow Is Too Slow
If the entire process is slow, don't look only at printer speed.
Analyze the complete chain:
Scanning Time + Design Time + Preparation Time + Printing Time + Post-Processing Time
A faster printer does not necessarily create a faster overall workflow if scanning, CAD design, or post-processing remains inefficient.
16. How to Build an Aident Digital Dental Workflow
For a clinic or laboratory starting digital dentistry, a practical equipment configuration could be:
Basic Chairside Workflow
Aident AI-30
CAD Software
Aident Dental 3D Printer
Dental Model / Application-Specific Resin
This configuration provides the basic infrastructure for a Scan → Design → Print workflow.
Dental Laboratory Workflow
A laboratory may additionally use:
Aident Intraoral Scanner
Aident Dental Lab Scanner
3Shape / exocad
Aident Dental 3D Printer
Dental Resin
This creates a broader digital production environment covering both digital data acquisition and manufacturing.
Aident's current product portfolio includes both intraoral and laboratory scanners as well as dental 3D printers and resins.
17. What Should You Check Before Buying a CAD/CAM System?
Before purchasing a digital dental system, evaluate the entire workflow instead of comparing only individual specifications.
1. Scanner Compatibility
Can the scanner export files required by your CAD software?
2. CAD Compatibility
Does your existing CAD software support the scanner's data?
3. Printer Compatibility
Can your printer workflow accept the CAD output?
4. Material Compatibility
Is the required resin available for the intended application?
5. Software Workflow
How many manual steps are required between scanning and printing?
6. Training
Can technicians and dental assistants learn the workflow quickly?
7. Technical Support
Is technical assistance available when workflow problems occur?
8. Total Cost of Ownership
Do not evaluate only the purchase price.
Consider:
Equipment + Software + Materials + Maintenance + Consumables + Labor + Remakes
This gives a much more realistic picture of the cost of digital dentistry.
18. Aident CAD/CAM Integration: Frequently Asked Questions
Can Aident intraoral scanners be used with CAD software?
Yes. Aident's published workflow information describes its intraoral scanning workflow as compatible with mainstream CAD platforms including 3Shape and exocad.
What file formats are used in the Aident digital workflow?
Common dental digital formats include STL, PLY, and OBJ. STL is widely used for CAD/CAM and 3D printing workflows.
Can I use Aident equipment with an existing CAD/CAM workflow?
Yes. Aident promotes an open digital workflow, allowing scan data to move into compatible third-party CAD software before being prepared for manufacturing.
Do I need to use Aident's CAD software?
Not necessarily. The important consideration is compatibility between the scanner's exported data, the CAD platform, and the manufacturing workflow.
Can Aident scanners work with exocad?
Aident's published workflow materials specifically reference exocad compatibility.
Can Aident scanners work with 3Shape?
Aident's published workflow materials also reference 3Shape compatibility.
Can I use Aident 3D printers for dental models?
Yes. Dental models are among the applications presented in Aident's dental 3D printing workflow.
What is the most important part of CAD/CAM integration?
The most important factor is the continuity of the entire data chain:
Scan → Data → CAD → Design → Print Preparation → Manufacturing → Post-Processing
A high-performance individual device has limited value if the data cannot move reliably to the next stage.
19. Final Checklist: Aident CAD/CAM Integration
Before starting production, use this checklist:
Scanning
☐ Complete digital scan
☐ Clear preparation margins
☐ Correct occlusion
☐ No obvious missing areas
CAD
☐ Correct case selected
☐ Correct restoration/model designed
☐ Contacts checked
☐ Occlusion checked
☐ Design completed
Printing
☐ Correct STL exported
☐ Correct orientation
☐ Supports checked
☐ Correct resin selected
☐ Correct printer profile selected
Post-Processing
☐ Washing completed
☐ Curing completed
☐ Model inspected
☐ Final application requirements verified
Conclusion: Build a Connected Digital Dental Workflow with Aident
CAD/CAM integration is not simply about connecting a scanner to a computer.
It is about creating a complete and repeatable digital workflow.
With the right configuration, the process can be simplified to:
Aident AI-30 → CAD/CAM Software → Digital Design → Aident Dental 3D Printer → Dental Resin → Finished Product
This Scan → Design → Print workflow can help dental clinics and laboratories reduce unnecessary physical steps, improve digital case communication, and build a more scalable production process.
Aident provides the key equipment needed to build this workflow, including intraoral scanners, dental lab scanners, dental 3D printers, and dental resins.
If you are planning to introduce or upgrade a CAD/CAM workflow, the best approach is to evaluate the complete digital chain rather than purchasing individual devices separately.
Ready to Build Your Digital Dental Workflow?
Explore Aident's dental scanning and 3D printing solutions, or contact the Aident team to discuss the equipment configuration for your clinic or dental laboratory.
Scan → Design → Print with Aident3D.