3D printing resin-based dental restorations (commonly temporary crowns, bridges, try-in dentures, or provisional prostheses) follows a clear digital workflow. The process typically includes data acquisition, CAD design, print preparation, printing, and post-processing. Below is a practical, clinic- and lab-oriented overview.
1. Oral Data Acquisition
Capture the patient's dentition using a high-accuracy intraoral scanner (powder-free systems are preferred for patient comfort and speed).
Alternatively, take a traditional impression and digitize it with a laboratory desktop scanner.
High-quality scan data is essential for good marginal fit and occlusion.
2. Digital Design (CAD)
Import the scan data into dental CAD software (e.g., exocad or other open systems).
Design the restoration with appropriate parameters such as:
Adequate occlusal thickness for strength
Controlled proximal contacts
Precise margin definition and emergence profile
Export the design as an STL file ready for slicing.
3. Print Preparation
Select a suitable biocompatible resin according to the intended use:
Temporary / provisional crown & bridge resin for short- to medium-term restorations
Try-in or denture-base resins for verification or longer-wear applications
Import the STL into the printer's slicing software.
Orient the model, generate supports, and set layer thickness (commonly 25–50 μm or according to the resin manufacturer's recommendation).
Confirm exposure times and other parameters matched to the specific resin and printer.
4. Printing
Load the selected resin into the printer vat.
Maintain recommended environmental conditions (stable temperature and controlled humidity improve consistency).
Start the print. Modern dental LCD/DLP printers can produce single crowns relatively quickly and full-arch models or multiple units in a reasonable timeframe.
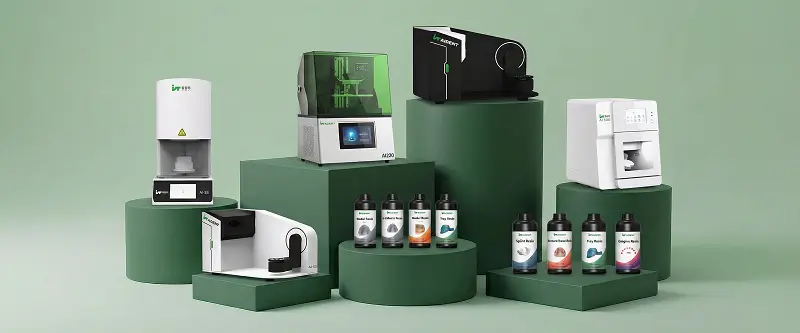
Aident Ai-C60 and Ai220 printers, for example, are designed for dental workflows with auto-leveling, temperature control, and open-system compatibility to support reliable results.
5. Post-Processing
Remove the printed part from the build platform.
Clean thoroughly (typically with isopropyl alcohol or manufacturer-recommended solvent) to remove residual uncured resin.
Remove supports carefully.
Perform secondary (post) curing according to the resin instructions (usually with a dedicated UV curing unit in the appropriate wavelength range) to achieve final mechanical properties and biocompatibility.
Finish and polish the restoration to refine margins, contacts, and surface gloss.
Verify fit, occlusion, and aesthetics on the model or intraorally before delivery.
Follow the resin manufacturer's guidelines regarding sterilization or disinfection when required.
Important Notes for Clinical Success
Always use resins that meet relevant biocompatibility standards (e.g., ISO 10993) for the intended duration of intraoral contact.
Final clinical acceptance depends on accurate scanning, proper design parameters, correct printing settings, and thorough post-processing.
Temporary restorations should be checked for marginal integrity, occlusion, and patient comfort before cementation or delivery.
Different resins have specific indications (short-term provisional vs. longer-wear try-in or denture base). Choose accordingly.
Streamlining the Workflow with Aident Solutions
A complete digital chain - accurate intraoral scanning, open CAD design, and reliable 3D printing - significantly shortens turnaround time and improves consistency.
Aident3D offers:
Powder-free intraoral scanners (AI-30)
High-precision dental 3D printers (Ai-C60 for chairside / compact use and Ai220 for higher volume)
Matched dental resins for models, temporary crowns & bridges, surgical guides, and related applications
Open-system compatibility that works with mainstream design software
This Scan → Design → Print approach supports same-day or rapid-turnaround provisional restorations and try-in appliances.
Ready to implement or optimize your 3D-printed resin restoration workflow?
Visit https://www.aident3d.com/ for printers, resins, and complete digital solutions, or contact us for technical guidance and demos:
WhatsApp +86 19311417410 | Email dongjiahao@aident.cc