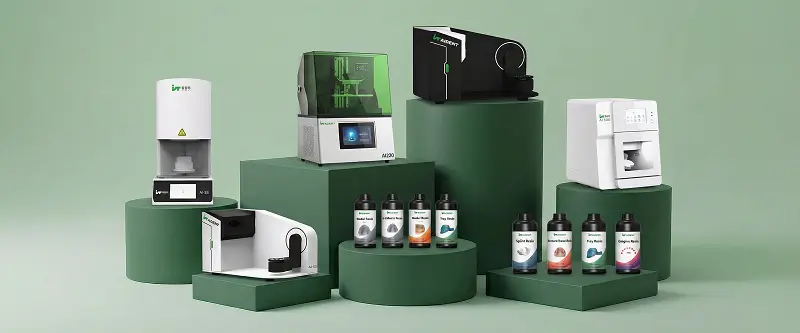
3D printing has become a standard part of digital dentistry. It converts digital designs created from intraoral or laboratory scans into physical objects such as models, surgical guides, temporary restorations and orthodontic appliances. Understanding how the process works end-to-end helps laboratories and clinics evaluate equipment, resins and workflows more effectively.
This article explains the complete sequence from data capture to finished object and highlights the practical factors that influence results.
The Role of 3D Printing in Digital Dentistry
In a traditional workflow, many steps relied on physical impressions, stone models and manual wax-ups. Digital dentistry replaces much of this chain with:
Electronic data capture (scanning)
Computer-aided design (CAD)
Computer-aided manufacturing (CAM), which includes both milling and 3D printing
3D printing is particularly well suited to objects with complex geometry, internal structures or the need for rapid, customized production in relatively small quantities. It is complementary to milling rather than a complete replacement for every indication.
Step-by-Step: The Complete Workflow
A typical dental 3D printing workflow contains these stages:
1. Data Acquisition
An intraoral scanner captures the patient's dentition directly in the mouth, or a laboratory scanner digitizes a conventional impression or poured model. The output is a digital 3D surface file.
2. CAD Design
Dental CAD software is used to design the required object - for example a diagnostic model, surgical guide, temporary crown, occlusal splint or orthodontic appliance. The finished design is exported, most commonly as an STL file.
3. Build Preparation and Slicing
The STL file is imported into slicing software. Here the operator or automated tools determine:
Orientation of the object on the build platform
Support structures
Layer thickness
Exposure parameters matched to the specific printer and resin
The slicer generates the layer-by-layer instructions the printer will follow.
4. 3D Printing
The prepared file is sent to the dental 3D printer. Most dental systems use vat photopolymerization: a light source selectively cures liquid resin layer by layer according to the sliced data. The object grows on the build platform until completion.
5. Washing
After printing, the object is removed from the platform and washed (typically in isopropyl alcohol or a dedicated cleaning solution) to remove uncured resin from surfaces and interproximal areas.
6. Post-Curing
The washed object is exposed to additional UV light, and in some cases heat, in a curing unit. This step completes polymerization and is essential for achieving the final mechanical properties and, where relevant, the biocompatibility specified by the resin manufacturer.
7. Finishing
Supports are removed, surfaces are smoothed if required, and the object is prepared for its intended use (for example, fitting a surgical guide or delivering a temporary restoration).
The quality of the final result depends on every stage, not only on the printer itself.
Core Printing Technology Used in Dentistry
The great majority of dental 3D printers used for models, guides and appliances rely on light-cured resin (photopolymer) systems. The three most common technologies are:
LCD / mSLA – An LCD screen masks UV light from an LED array to form each layer. Widely used because of cost-effectiveness and improving performance.
DLP – A digital projector exposes an entire layer at once. Often valued for consistency of illumination across the build area.
SLA – A laser draws each layer. Still used in some high-detail applications.
All of these methods build the object additively, layer by layer, from liquid resin that solidifies when exposed to the correct wavelength of light (commonly 385–405 nm).
Factors That Determine Final Quality
Several elements strongly influence clinical or laboratory acceptability:
Accuracy and calibration of the scanner
Quality of the CAD design and margin definition
Printer accuracy, light uniformity and mechanical stability
Correct resin selection for the indication
Proper orientation and support strategy
Thorough washing and adequate post-curing
Operator training and process discipline
A high-resolution printer cannot compensate for a poor scan, incorrect resin or incomplete post-curing.
Chairside vs Laboratory Use
Chairside (clinic) environments typically prioritize speed for models, surgical guides or temporary restorations, compact equipment size, and straightforward operation. Same-day or next-day turnaround is often the goal.
Laboratory environments usually emphasize higher daily throughput, larger build volumes, consistency across many units, and the ability to handle a broader range of indications (models, guides, castable patterns, aligner models, etc.).
Many successful digital workflows combine both: scanning in the clinic and centralized or in-house printing in the laboratory.
Practical Limitations
3D printing in dentistry is powerful but has boundaries:
Not every indication is best served by printing; milling remains preferable for certain high-strength final restorations.
Accuracy is process-dependent and must be validated for each printer–resin combination.
Patient-contact devices require resins that meet the appropriate biocompatibility and regulatory requirements.
Post-processing equipment and consumables are necessary parts of the total workflow cost.
Open material systems offer flexibility; closed systems may simplify validation but can increase material dependency.
FAQ
Is dental 3D printing the same as industrial 3D printing?
The underlying principle (additive layer-by-layer construction) is similar, but dental systems are optimized for the accuracy, materials, software integration and regulatory expectations of dental applications.
How long does a typical print take?
Print time varies widely according to object size, layer thickness, number of units on the platform and printer technology. Small models or single guides may take under an hour; full platforms of models can take several hours.
Do I need a separate washing and curing unit?
Yes in almost all professional workflows. Proper washing and post-curing are required to achieve the material properties stated by the resin manufacturer.
Can printed objects be sterilized?
Some surgical-guide resins are validated for specific sterilization methods (for example, autoclave under defined conditions). Always follow the resin manufacturer's instructions; not all resins are sterilizable.
What is the most common starting application for new users?
Diagnostic and working models are usually the highest-volume and most forgiving entry point. Surgical guides and temporary restorations require stricter process control and material selection.
Next Steps
Understanding the full workflow - from scan to finished object - is the foundation for selecting appropriate printers, resins and supporting equipment. When evaluating systems, look at demonstrated performance across the complete process rather than isolated technical specifications.
If you are exploring how 3D printing can fit into a complete digital dentistry solution (scanning + design + printing), you can review detailed equipment information or request a technical discussion through the manufacturer's official channels.